This tutorial explains how you can install a website on a Plesk platform.
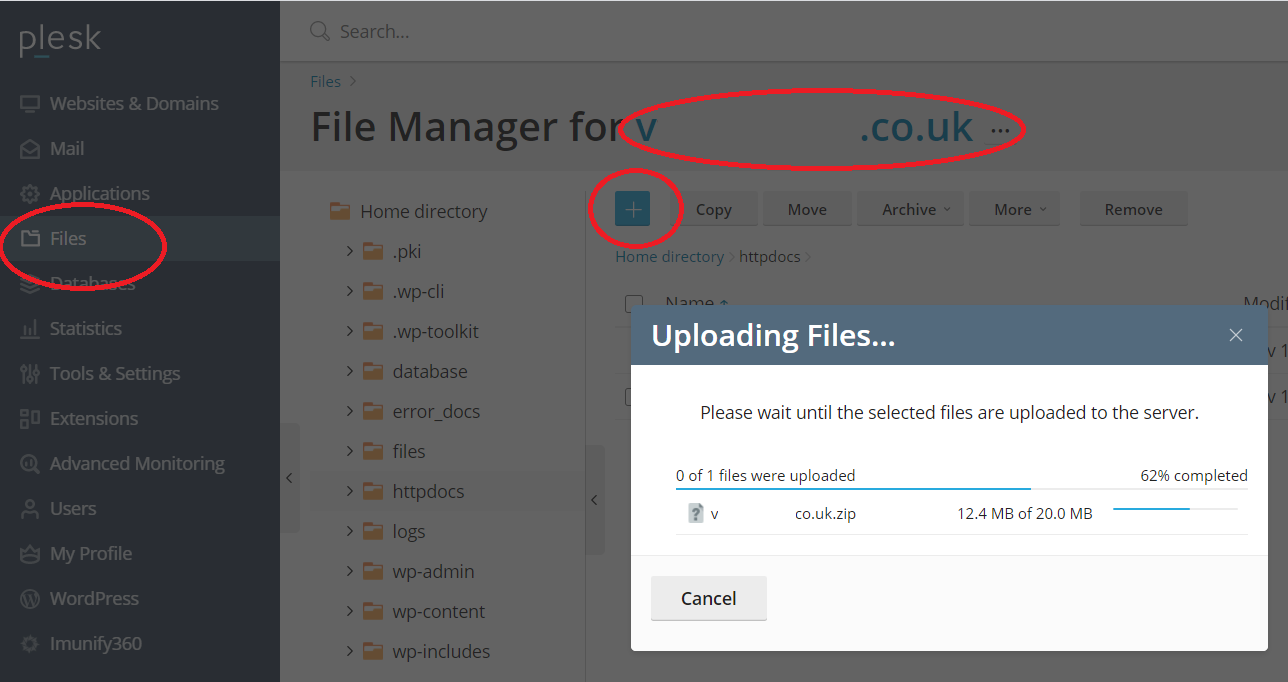
Step 1. Go to the file manager for your domain. Click on the "+ button" to upload a file, and select the ZIP file that you received from waybackmachinedownloader.com
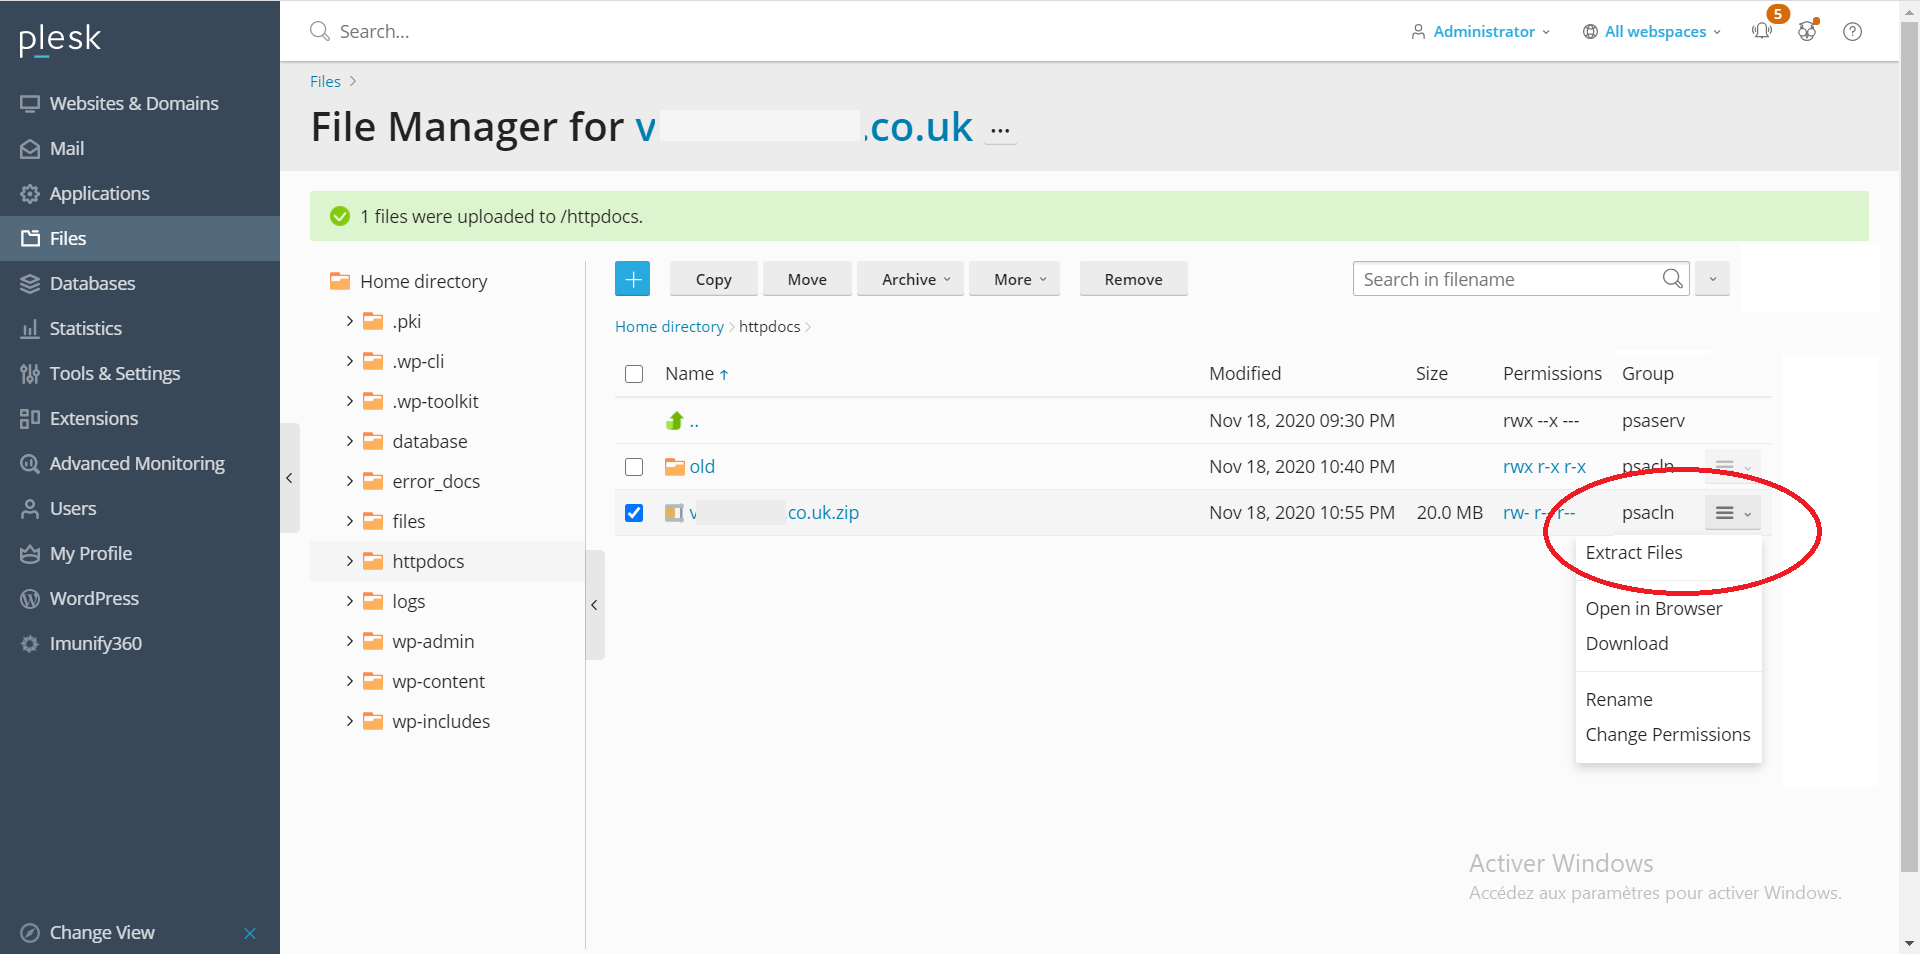
Step 2. Extract the ZIP file. If you only ordered the HTML-version, then this is it. The site should have been succesfully installed. If you also ordered the WordPress version, then continue with step 3 .
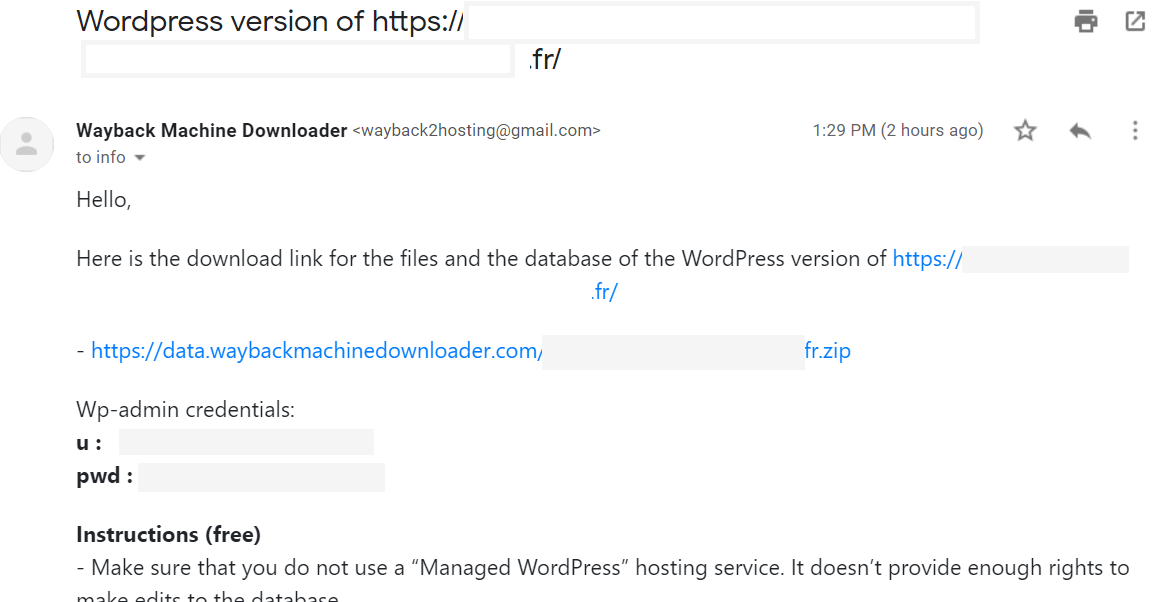
Step 3. Wait for one of our developer to send you the ZIP file for the WordPress version via email*. This normally takes 24 hours, but could take up to 72 hours.
Follow step 1 and 2, to upload and extract the ZIP file of the WordPres version. The file for the WordPress version is a different ZIP file, but the process to upload and extract the file is the same as with the HTML version.
PRO tip: if you have a really large site, then you can speed up the file transfer process by first removing the database (.sql) file from the ZIP. You’ll actually only need this file in step6.
* The email for the WordPress should look something like this:
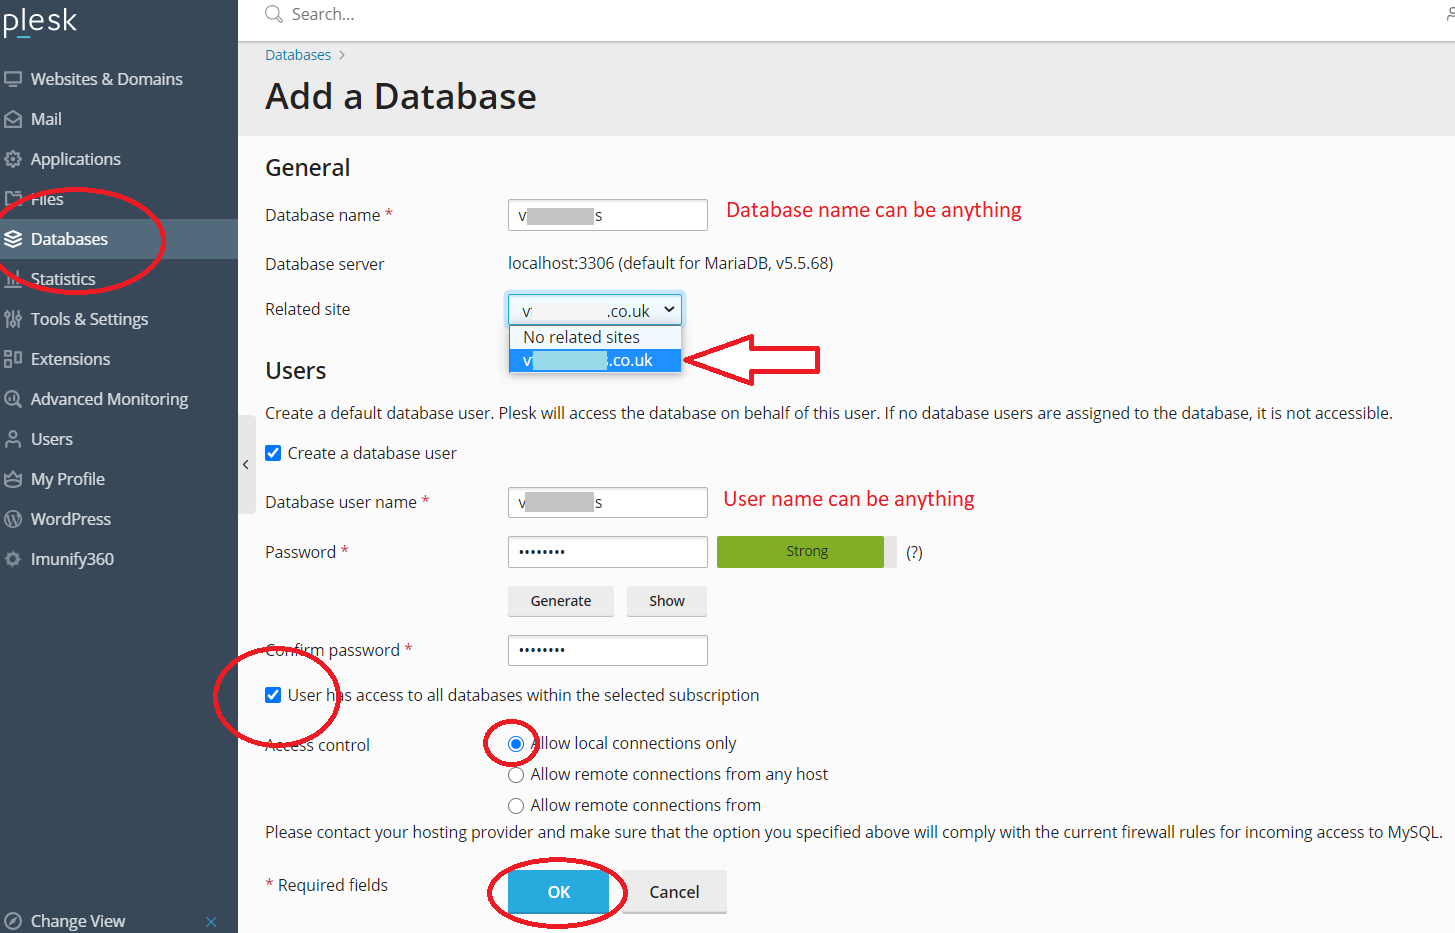
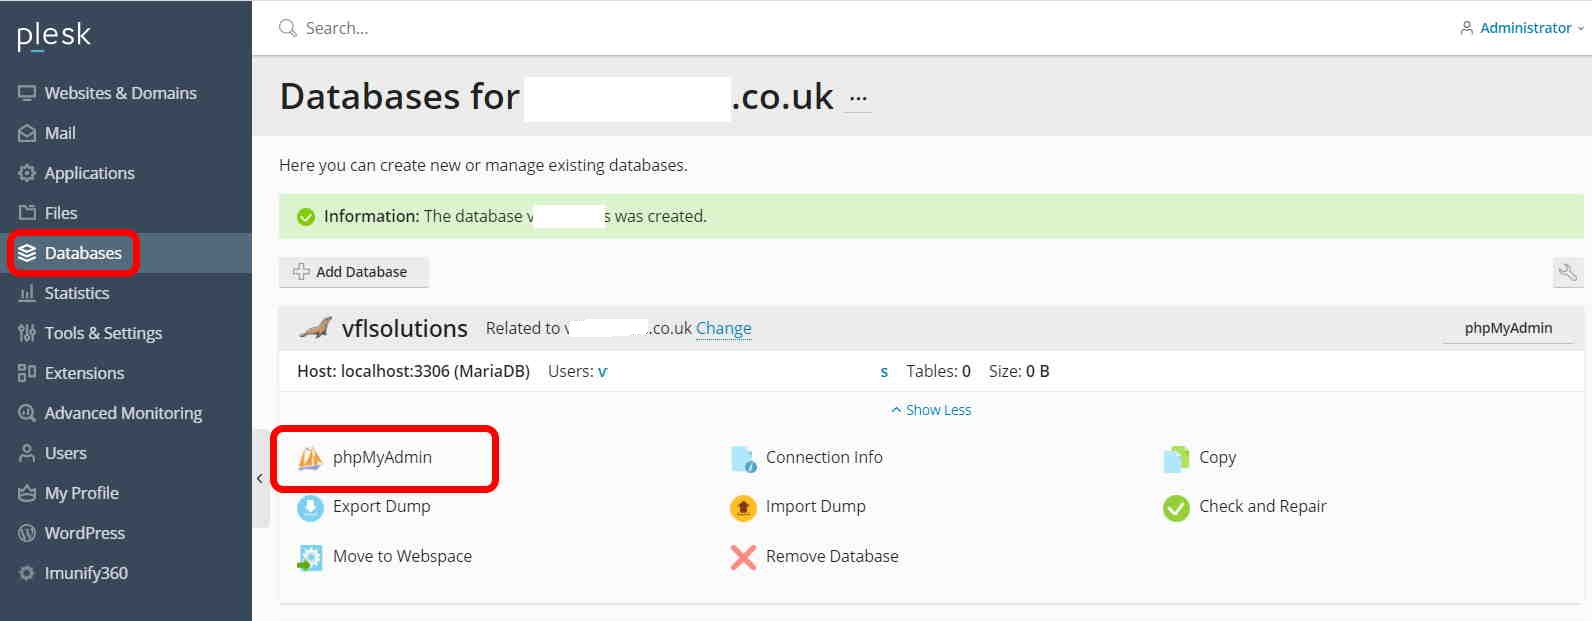
Step 4. Go the "Databases", and add a database as in the picture below. Select the related site and enable:
Step 5. Open PHPMyadmin
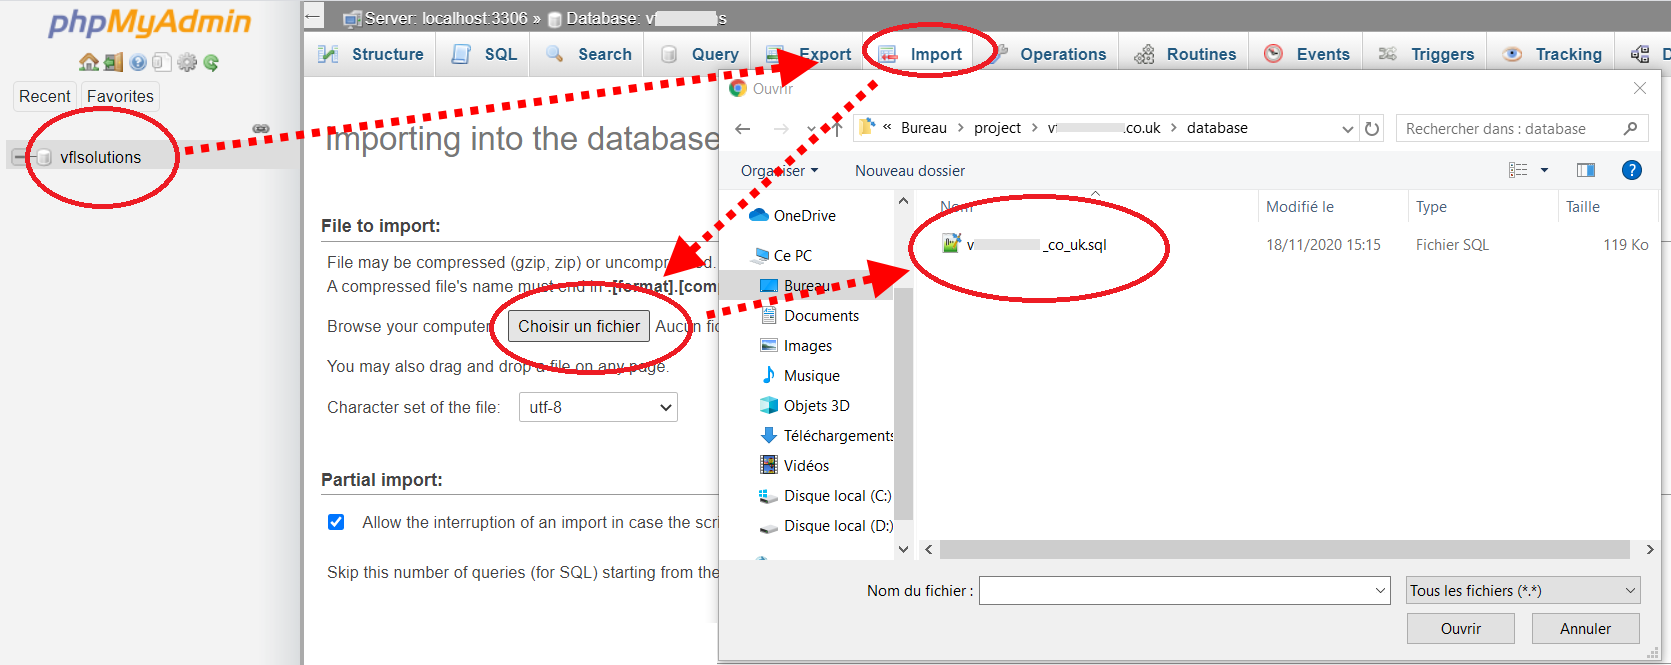
Step 6. Import database
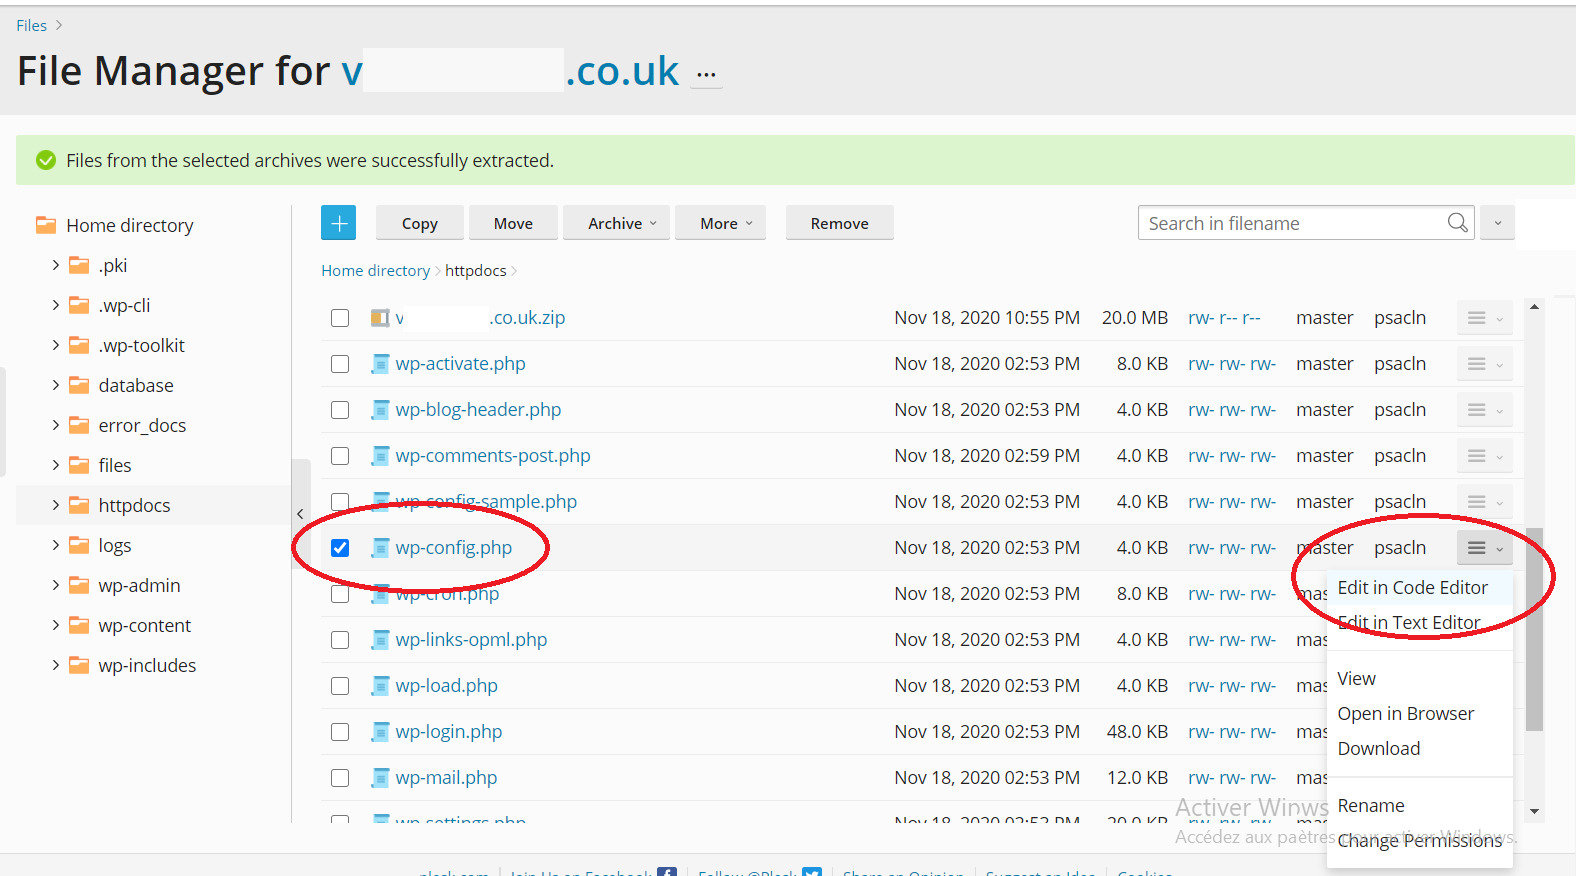
Step 7. Go back to your file manager and edit the file "wp-config.php"
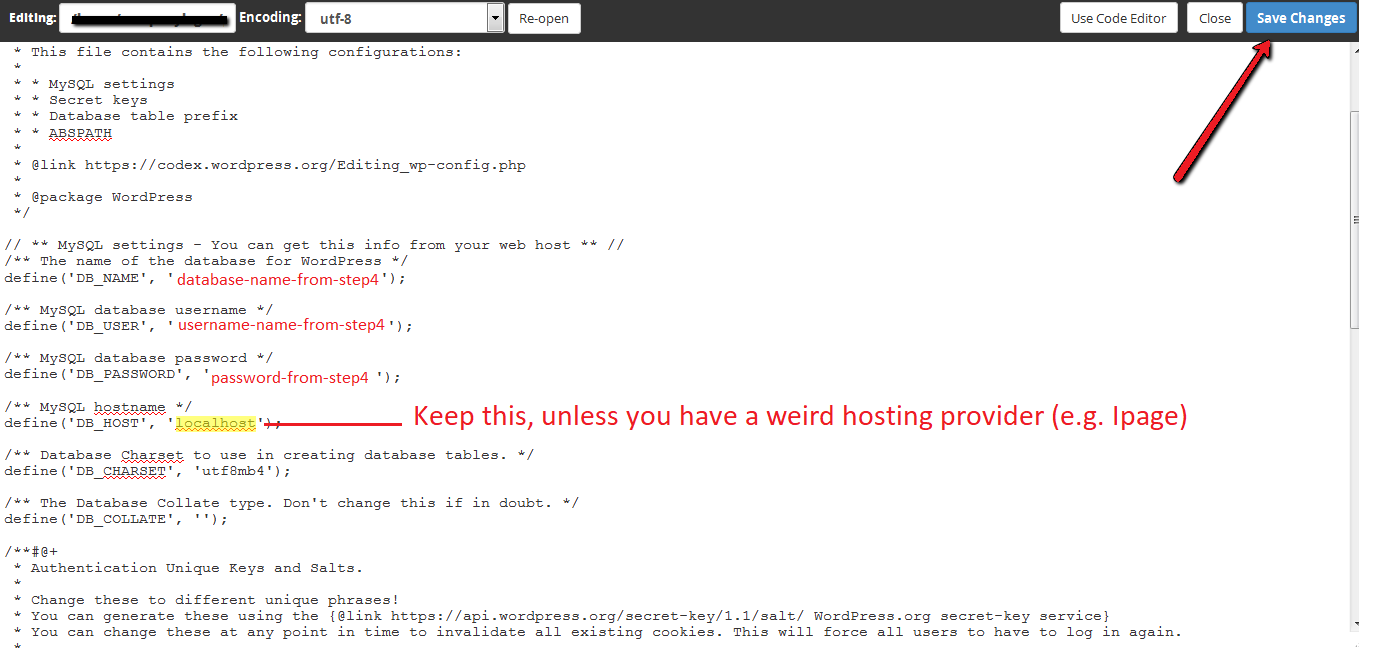
Step 8. Edit wp-config.php to connect to the database. This might look daunting, but it’s really simple. You just have to change some words:
With some hosts you also have to change the hostname, but with 95%+ of hosting companies, you can leave this as "localhost". For example with iPage it is "UsernameOfYourAccount.ipagemysql.com"
HTML installation instructions
Wordpress installation instructions
If you managed to do all the steps above and your site still doesn't work, then make sure that the HTML files are located in the folder public_html/yourdomain.com/. You can check this with an FTP account with admin rights, or go to cPanel > File Manager. Check if the files are indeed located in public_html/yourdomain.com/.
If you are trying to install the WordPress version, then place a simple index.html in this folder. Then browse to the domain and see if the index file is portrayed correctly. If it doesn't show, then there is probably something wrong with your server configuration (for example, you didn't create an addon domain) or with your DNS settings (check your name server configuration).

When you have an unexpected redirect loop error ("domain.com redirected you too many times"):
1. For WordPress users, this is usually caused by incorrect file/folder permissions. This should be 755 for all folders and sub-folders. It should be 644 for all files. For information on how to set permissions see this guide
2. The redirect loop can also be caused by corrupted files after using cPanel to unzip the files. Try to extract (unzip) the files locally and then transfer them via FTP software in an uncompressed form.
If it still doesn't work, we can also do it for you. Just send $10 to our Pay Pal account and an email to our support address with your hosting account details. For WordPress installations, this charge is a fixed $30. You can pay via this form